Mega menu
Genstore supports mega menus in your store navigation. A mega menu helps you present complex product categories in a clear hierarchy, while also letting you add promotional or featured content directly in the navigation. By combining navigation and marketing in the store header, it makes browsing easier and boosts conversions.
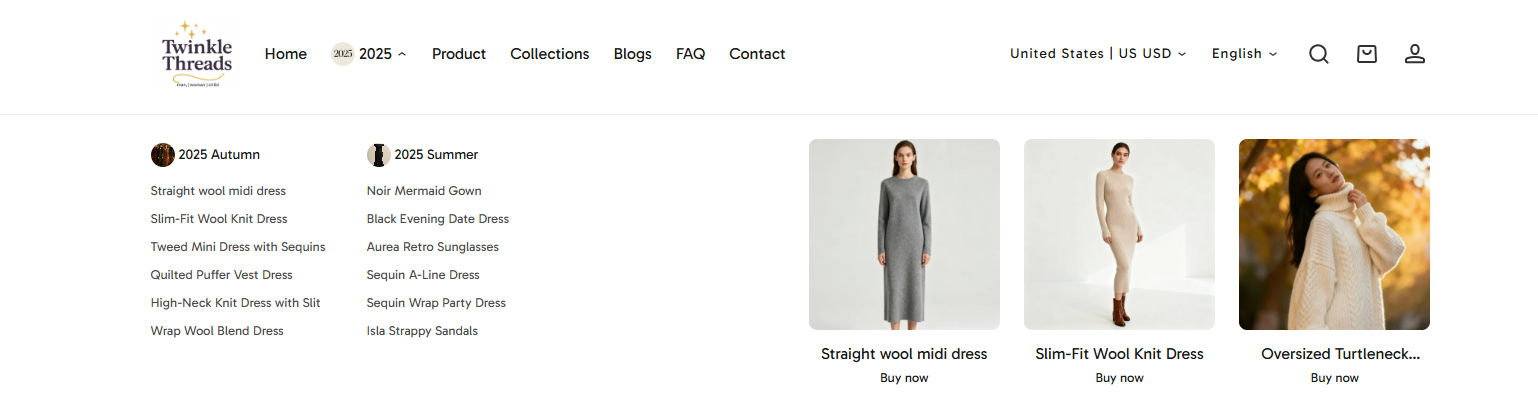
Structure and display
A mega menu is made up of multi-level navigation and promotional content:
- Navigation menu: Supports up to three levels (e.g., Men → Outerwear → Down Jackets).
- Promotional content: Add banners, featured collections, or products directly inside the menu.
Step 1: Create a multi-level menu
To use a mega menu, you first need to create a multi-level menu.
- Default behavior: Multi-level menus are displayed as dropdown lists.
- With mega menu: You can later link them with a mega menu block in the theme editor to enhance the design and add promotional content.
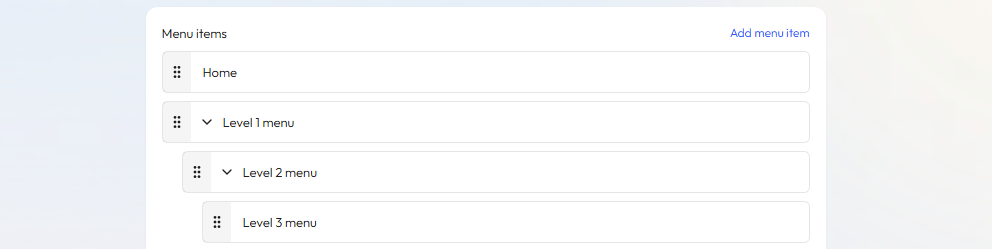
Genstore supports three levels of navigation. By creating second-level and third-level menu items, you can group products, collections, or pages to help customers quickly find what they need:
- Level 1 → Top navigation entry
- Level 2 → Main columns of the mega menu
- Level 3 → Sub-lists within each column
Steps
- In Genstore admin, go to Store -> Online Store -> Menus, and click the pencil icon next to Main menu.
- Click the + button next to the target menu item.
- In the pop-up, enter the menu name, URL (destination page), and optionally add an image.
- Click Save.
- The new menu item will appear under the parent menu as a second-level item.
- Repeat steps 2–4 to continue creating drop-down menus.
- Click Save to complete setup.
Step 2: Enable a mega menu in the theme editor
Once your multi-level menu is ready, you can link it with a mega menu block in the theme editor and customize its layout and promotional groups.
Steps
- In Genstore admin, go to Store -> Online Store -> Themes, and click Customize on your target theme.
- Under Header -> Header, click Add block and select Mega menu.
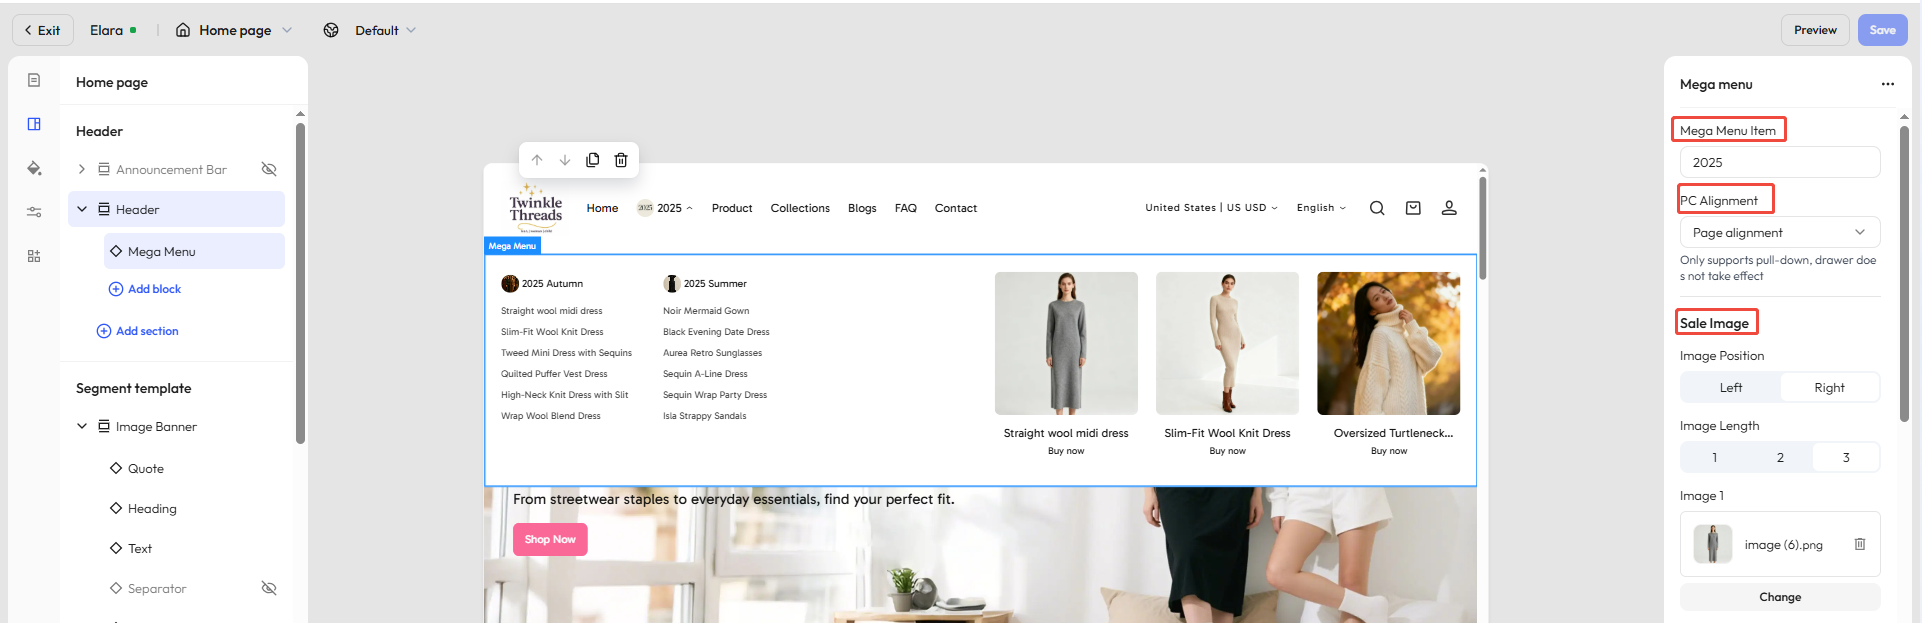
- Click the mega menu to select it. In the right-hand editor panel
- Enter the name under Mega Menu Item to link. Note: The text must exactly match the navigation menu name. Extra spaces, case differences, or symbols will prevent the link from working.
- PC alignment: Align to page / Justify / Adapt.
- Promotional groups: Add up to 3 groups, each with images, heading, button, and link.
Promotional group settings
| Setting | Description |
|---|---|
| Image position | Display image on the left or right |
| Image count | 1–3 images per group |
| Heading | Title text for the promotion |
| Button text | Custom label for the call-to-action |
| Button link | Destination link when clicked |
| Layout | Text outside the image / Text overlay on the image |
| Content alignment | Left / Center / Right |
| Aspect ratio | 1:1, 3:4, 4:3, or adapt (use original ratio) |
| Shape | Standard / Square / Rounded / Capsule / Arch |